Friday, December 23, 2011

Paper Snowflake DIY


Not enough snow for a white Christmas? Never fear - we have a DIY snowflake project that will fix that in no time.

We made several of these for our holiday window display and have had many requests for instructions. They are very pretty and quite easy to make requiring only a few supplies.

Note: The snowflakes in the window display are 22" tall, so we have re-sized the instructions to better accommodate house decor.

Here is what you need to get started:

* 7 squares of text weight paper cut to 6.5" x 6.5"
Double sided tape {Tip: if using metallic paper we suggest using a stronger
adhesive such as red liner tape
Paper cutter or scissors
Stapler

Step 1:
Fold the square corner to corner, creating a triangle


Step 2:
Fold triangle in half again


Step 3:
Make 3 cuts running parallel to the edge of the triangle, being
careful not to cut thru center fold
{Tip: for a 6.5" square we made equally spaced cuts however for the 8.5" squares used in our window display we varied the distance for more visual interest and added one extra snowflake point to fill out the snowflake}


Step 4:
Open triangle and lay paper flat


Step 5:
Roll center cuts toward each other and adhere center triangle points with double sided tape
{Tip: use a pencil or your finger to help form center roll}


Step 6:
Flip the paper over and adhere triangle points in the next row.


Step 7:
Flip the paper back over and adhere the next row of triangle points; alternating front to back for the last two rows.


Step 8:
Grab each of the seven snowflake points and staple them together at the top.


Step 9:
Open up the snowflake points and apply double sided adhesive between each of the points.


Your snowflake is now ready for display!

Wednesday, December 21, 2011

On the twelfth day of Christmas PaperDolls gave to me

Twelve holiday cards of your choosing!


Leave a comment to be entered to win!
(Comments will be compiled from Facebook, our blog and Twitter and a winner will be drawn at random each day.)


Tuesday, December 20, 2011

On the eleventh day of Christmas PaperDolls gave to me

A set of eleven Le Pens!

Leave a comment to be entered to win!
(Comments will be compiled from Facebook, our blog and Twitter and a winner will be drawn at random each day.)


Monday, December 19, 2011

On the tenth day of Christmas PaperDolls gave to me

Ten Crane holiday gift tags!

Leave a comment to be entered to win!
(Comments will be compiled from Facebook, our blog and Twitter and a winner will be drawn at random each day.)

Sunday, December 18, 2011

On the ninth day of Christmas PaperDolls gave to me

A bundle of nine wooden pencils!


Leave a comment to be entered to win!
(Comments will be compiled from Facebook, our blog and Twitter and a winner will be drawn at random each day.)

Saturday, December 17, 2011

On the eighth day of Christmas PaperDolls gave to me

A box of 8 Great Arrow Holiday cards!


Leave a comment to be entered to win.
(Comments will be compiled from Facebook, our blog and Twitter and a winner will be drawn at random each day.)

Friday, December 16, 2011

On the seventh day of Christmas PaperDolls gave to me


Seven Drink Me wine tags!


Leave a comment to be entered to win!
(Comments will be compiled from Facebook, our blog and Twitter and a winner will be drawn at random each day.)

Thursday, December 15, 2011

On the sixth day of Christmas PaperDolls gave to me


Six scented pencils!

Leave a comment to win!
(Comments will be compiled from Facebook, our blog and Twitter and a winner will be drawn at random each day.)

Wednesday, December 14, 2011

On the fifth day of Christmas PaperDolls gave to me


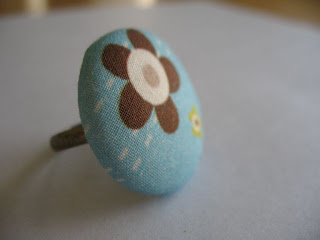
Five fabric covered rings!


Leave a comment to win!
(Comments will be compiled from Facebook, our blog and Twitter and a winner will be drawn at random each day.)

Tuesday, December 13, 2011

On the fourth day of Christmas PaperDolls gave to me


A set of four "Desk Tool" magnets from Seltzer!

Leave a comment to be entered to win!
(Comments will be compiled from Facebook, our blog and Twitter and a winner will be drawn at random each day.)

Monday, December 12, 2011

On the third day of Christmas PaperDolls gave to me


Three Vera Bradley pocket pals in Tea Garden


Leave a comment to be entered to win!
(Comments will be compiled from Facebook, our blog and Twitter and a winner will be drawn at random each day.)

Sunday, December 11, 2011

On the second day of Christmas PaperDolls gave to me


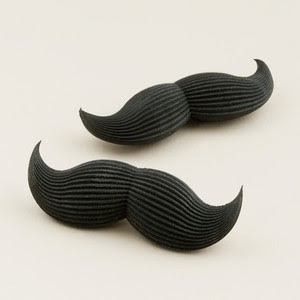
Two mustache erasers!


Use them to edit your holiday card list, plan out your seating arrangements for Christmas dinner or just carry one in your purse for a good laugh.

Leave a comment to win!
(Comments will be compiled from Facebook, our blog and Twitter and a winner will be drawn at random each day.)

Saturday, December 10, 2011

The PaperDolls 12 Days of Christmas Giveaway is back!

Ready for something that is holiday related but isn't stressful? It's time for the PaperDolls 12 Days of Christmas giveaway! For the next 12 days we are giving away some of our favorite goodies from the shop. Leave a comment and you will be entered to win - it is that easy! (Comments will be compiled from Facebook, our blog and Twitter with a winner drawn randomly each day.)

Let's get started!

On the first day of Christmas PaperDolls gave to me:

One cherry bomb lip gloss from Tokyomilk


Leave a comment and you will be entered to win


Tuesday, September 27, 2011

Big news!


We are thrilled to announce our move to 438 Broadway! Stay tuned for more details.

Tuesday, May 3, 2011

Don't forget Mom!

Mother's Day is right around the cornered and we've got you covered if you haven't finished shopping for Mom:

The Rag & Bone Recipe Journal is sure to be a hit with ample space to record the recipes as well as the occasion.


Emilie Sloan tote bags, lunch totes and coinlets in fresh patterns made of laminated covered cotton are springy and practical.


Flora and fauna themed file folders and sticky notes liven up any desktop.


And don't forget the card!


Wednesday, February 23, 2011

To engrave or not to engrave...

...that is a question that we hear quite often. With the seemingly endless variety of invitation styles and designs available, choosing a wedding invitation can seem an overwhelming task. When considering your bridal stationery budget it is helpful to know the various print methods and costs associated. Here is a simple description of each:

1. Engraving


Engraving is the most traditional printing method for wedding invitations and it is also the most expensive. The hallmark of engraving is sharp, raised print created by a copper or steel die used on a press. The die is engraved with the text and motif and then inked. Excess ink is wiped away and pressure is used to transfer the image onto the paper. To tell if something has been engraved turn it over and you will see a slight indentation on the back of the paper where the line of type falls.

2. Letterpress


Letterpress was created by Johannes Gutenberg in the mid 15th Century, and has seen an increase in popularity over the last several years. Instead of raised print, letterpress is a relief printing which uses a reverse raised surface which is then pressed into cotton or bamboo paper. Custom press plates are required and the labor involved can make it almost as expensive as engraving.

2. Thermography


Thermography was created to mimic the raised print of engraving at greatly reduced price. To achieve the raised print, powder is added to the wet ink and the paper is then heat set creating a raised effect.

4. Flat/Digital Printing


The least expensive print method is digital printing. Printing methods vary from laser to giclee and invitations printed in this manner can be just as beautiful, and much more affordable, then the above mentioned print methods.

No matter your budget, there are plenty of design and print styles for invitations that best represent your personality. We welcome the opportunity to show you the options and help you to choose the invitation that will set the tone for your special day. (Appointments are appreciated, but you are welcome to stop by and browse our selection.)

Tuesday, February 22, 2011

You are invited...

...to a Saturday afternoon Soiree!

Please join us on March 3rd from 2pm-5pm at an open house hosted by Rena's Fine Flowers, Heather Bohm-Tallman Photography and Deborah DePasquale Designs.

The party takes place in all three locations which are right next door to each other at the corner of Beekman & Ash Streets in Saratoga Springs.

We'll have some samples of our work and will be joined by The Bread Basket Bakery (cupcakes!), Lily and the Rose catering, Lily of Saratoga, Mimosa and the music of John Charles Cook.

It's sure to be a fun afternoon - swing on by!

Friday, February 4, 2011

10 for $10 Valentine Making

Looking for some Valentine inspiration? Stop by this coming Saturday (2/5) and next (2/12) any time between 11am-3pm for Valentine making. For $10 you will get 10 cards & envelopes and access to our supplies to create your Valentine masterpiece.


No time on Saturday? No problem! We have a table loaded with supplies that you can purchase to take home and create at your leisure.